| |
chamber fan
The chamber fan is a powerful modification that increases muzzle velocity, helps improve reliability and provides convenience during operation. The function of the chamber fan is to mix the fuel with the air inside the chamber to create a consistent explosive environment. The fan is also used to quickly ventilate the chamber with fresh air after the shot is complete. The explosion inside the chamber does not damage the fan or wires but a starchy buildup is common when shooting spuds.
|
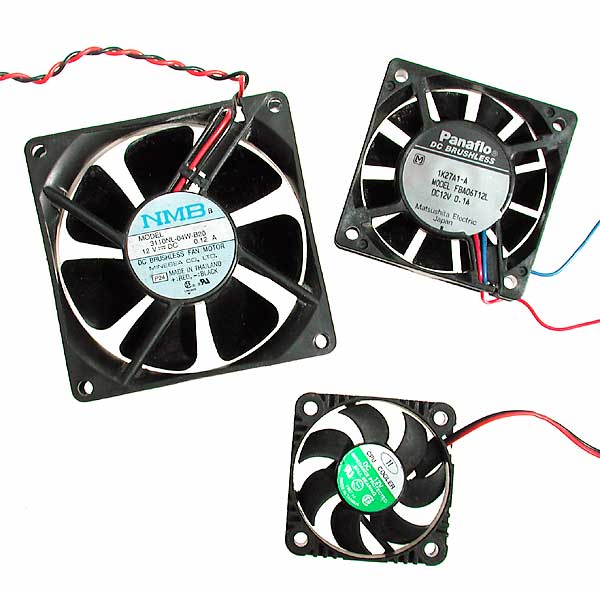
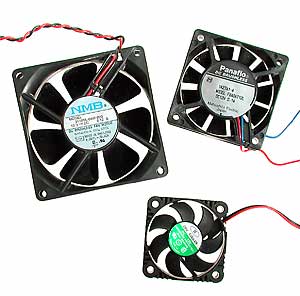
It is critical to use a fan whose motor does not produce any sparks to avoid accidental ignition. Some fans use special brushless motors which do not produce sparks and are reasonably safe to use inside combustion chambers. These brushless fans are commonly used to cool computer CPU's and are DC powered. CPU fans are available at computer recyclers for a fraction of their retail price. The used fans pictured here cost 25 cents each. CPU fans are available in a variety of sizes, these are 50, 60 and 80mm models.
|
|
|
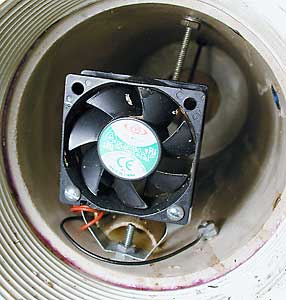
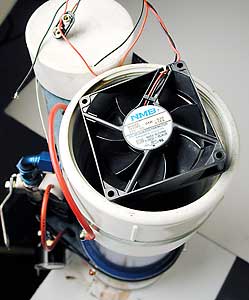
The fan is usually placed near the rear of the chamber for easy maintenance and blowing toward the muzzle to push the fuel into the existing air. During ventilation the fan draws fresh air into the chamber and exhausts through the muzzle end. The endcap must be removed first to let fresh air in and removing the barrel or opening the bolt will further improve circulation. Brushless motors are non reversible which makes it difficult to change the direction of air flow. Pictured here is a 50mm CPU fan on a tower mount.
|
|
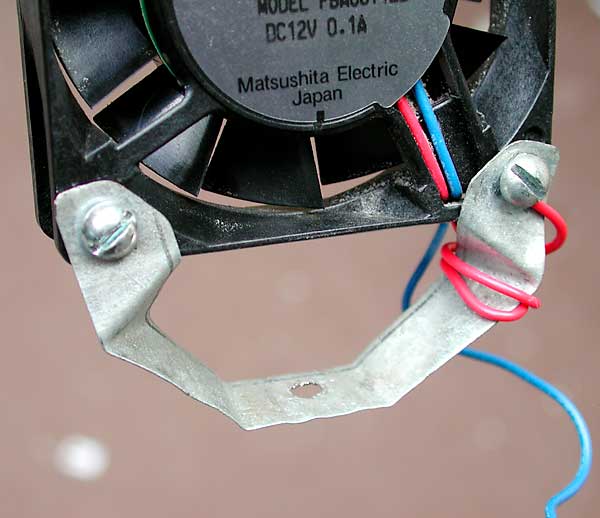
The tower mount is a simple and flexible way to attach a smaller chamber fan. A bracket for the fan is cut from a piece of scrap metal using tin snips. Cut a half inch strip of metal and drill a hole in the center and at each end. Bend the strip using two pliers into a suitable shape. Use small nuts and bolts to fasten the fan to the ends of the bracket. The hole in the middle of the bracket is placed over one of the fans electrodes and secured which holds the entire assembly in place. For convenience, one of the fans wires can be connected to the metal bracket which will conduct through the fan electrode it's mounted to.
|

|
|
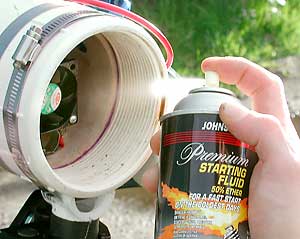
Spray propellants often enter the chamber unevenly which can create concentrated areas in the chamber which are too rich to ignite completely and other areas which are starved for fuel. The chamber fan mixes the fuel and air together which improves reliability and performance. Tower mounts make it easy to use chamber fans with spray propellants like hair spray and Right Guard. Start with the fan in the off position and spray a short burst into the chamber avoiding the fan then replace the endcap. Turn on the fan for a few seconds to mix the fuel with the air then shoot. Remove the endcap and turn the fan on again to ventilate the chamber.
|
|
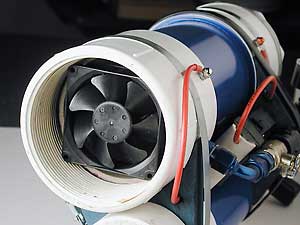
Some fans are too large to tower mount and require a different approach. The force from the combustion does not usually impact the fan or cause it to move so it is possible to simply wedge the fan into place. This is called a friction mount and will sufficiently secure the fan in place under normal circumstances. Pictured here is an 80mm fan which is slightly too large to fit inside a 4" fitting before modification.
|
|

|
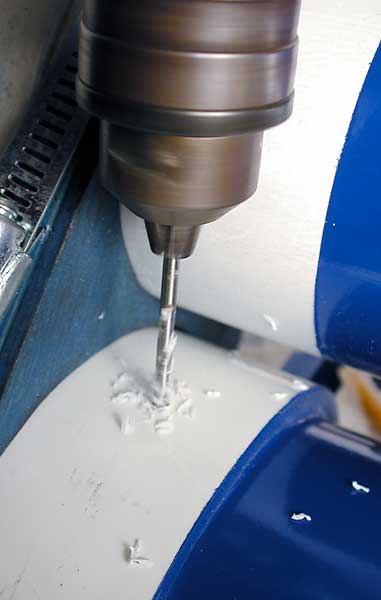
Use a Dremel or file to grind down the corners of the cage until it will fit snugly into the launcher. Extra notches were cut into this fan to help it seat squarely on the chamber pipe. If the fan does not stay firmly in place, use a wrap of heavy tape to build up the diameter of the cage or hot glue the corners to the PVC. The combustion will not harm the tape or burn the paper label on the back of most fans. The label helps keep starch off of the circuit board. Notice the arrows on this fan which indicate the direction of air flow.
|
|
Large friction mount mount fans are appropriate for launchers with direct fuel injection as there is no room to spray an aerosol around the cage. These full sized fans provide outstanding mixing ability and extremely quick ventilation.
|
|

|
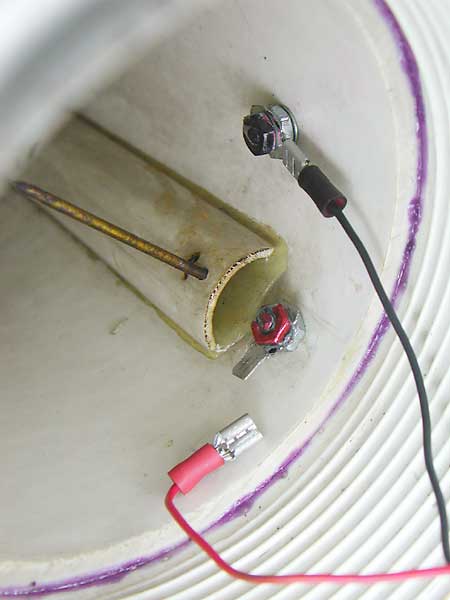
Getting power to the fan requires drilling some holes in the launcher. It is possible to use a tower mount or a friction mount on the same launcher. Think carefully about fan electrode placement before drilling. Position the fan electrodes away from the ignition electrodes to avoid short circuits and drill through two layers of plastic at the coupling. Use small #6 screws for the fan electrodes and use a tap to create threads in the plastic to help seal leaks.
|
|
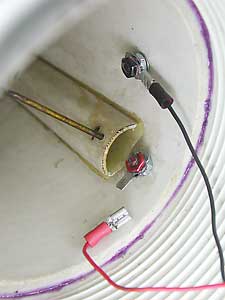
The electrodes pictured here have been fitted with quick disconnect posts. To make these posts, drill a couple holes in a piece of thin scrap metal then cut a "key" shape around the hole with tin snips. Add female connectors to the wires coming from the fan. This circuit is DC so correct polarity must be observed or the fan will not work. Labeling the electrodes polarity with red and black helps avoid confusion. The outer side of the fan electrodes (not pictured) also have quick disconnect posts which allows for a variety of power supplies to be used
|
|

|
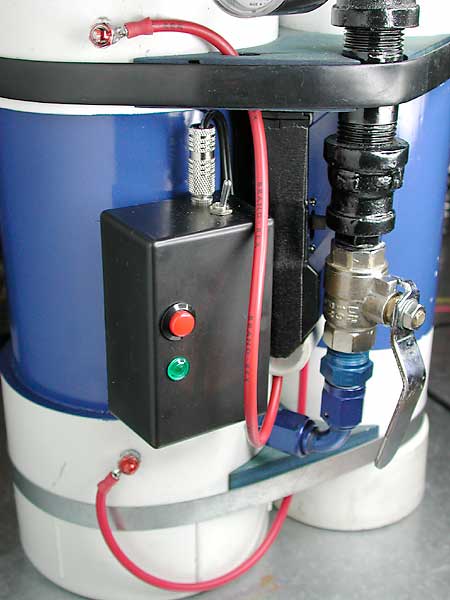
CPU fans are usually 12 volt devices but they will spin at medium speed with a single 9v battery. It is also possible to use 8 AA batteries in series which will generate 12 volts to power the fan properly . A momentary pushbutton switch held on for 5-10 seconds can be used to help conserve batteries. An AC to 12v DC adapter may also be used for continuous operation in testing environments. Voltages higher than 12v can damage the fan but it is possible to run as high as 15v for short durations. The fan circuit should be kept separate from any high voltage ignition circuits like stunguns. The fan controller pictured here suffers negligible interference from the ignition lead passing nearby.
|
|
Pictured here and above is an easy to build fan controller which turns the fan on with the push of a button and then shuts it off automatically after a predetermined time. The controller uses 2 lightweight 9v batteries providing 18v which is then stepped down to 15v, run through the timer and supplies 13.4v at the fan. Schematics and details for this fan timer are available here.
|

|

|
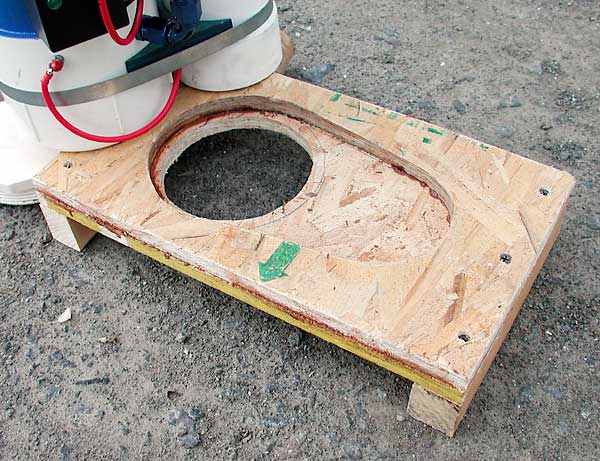
A nice field accessory to compliment your new chamber fan is a riser platform. The riser has a hole in it to allow air to circulate through the chamber while unattended or during reloading. The riser also keeps the launcher out of the dirt and mud protecting the threads and fittings. The base of our L1 launcher is not round which let us cut an egg shaped hole in the riser for the launcher to sit into. This acts as a lever and holds the chamber in place while the barrel is untwisted for removal.
|
|
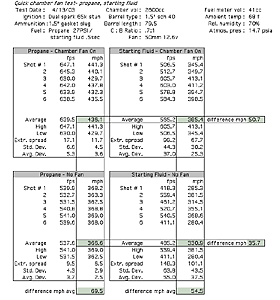
Chamber fans are fantastic. They are one of the few modifications to provide the triple benefit of convenience, reliability and performance. A self ventilating chamber is a luxury that becomes difficult to do without. The consistent fuel mixture helps reduce misfires and can elevate the reliability of standard BBQ igniters. The most significant benefit is the dramatic increase in velocity. A small 50mm fan in a 4" chamber has been shown to increase muzzle velocity by over 60 MPH. Click the chart to the right to see the dramatic effects of a chamber fan using propane and spray propellants.
|
|
|
|
|