| |
stun gun ignition
The quest for the perfect spark has brought us here. For convenience, reliability and power, nothing beats a stun gun. Stun guns come in a variety of voltages from 50,000 to 600,000. A 50k volt spark will ignite a chamber just as well as a 600k spark. Lower voltage stun guns provide battery economy, fewer insulation problems and obvious safety benefits. A large stun gun hurts more than you'd think. Expect to zap yourself at least once.
|
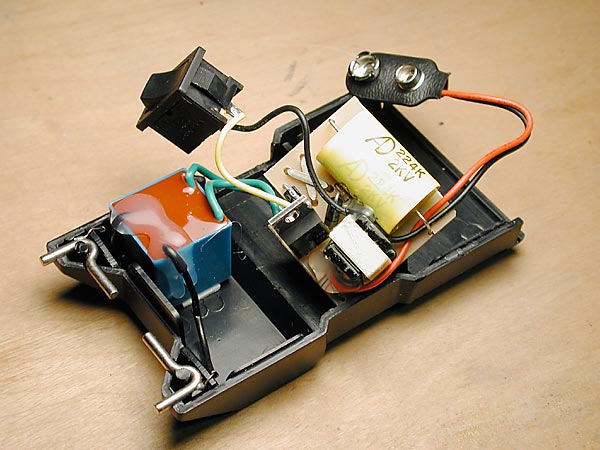
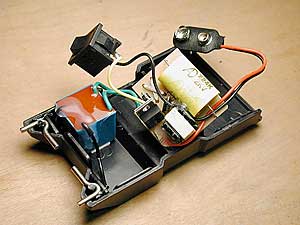
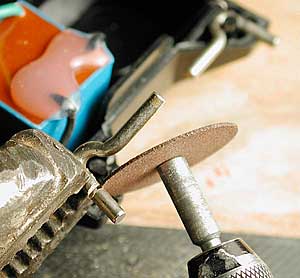
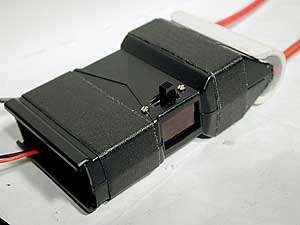
Pictured here is a pocket sized, 65K zapper with the cover removed. A screw together design helps with disassembly.
|
| |
|
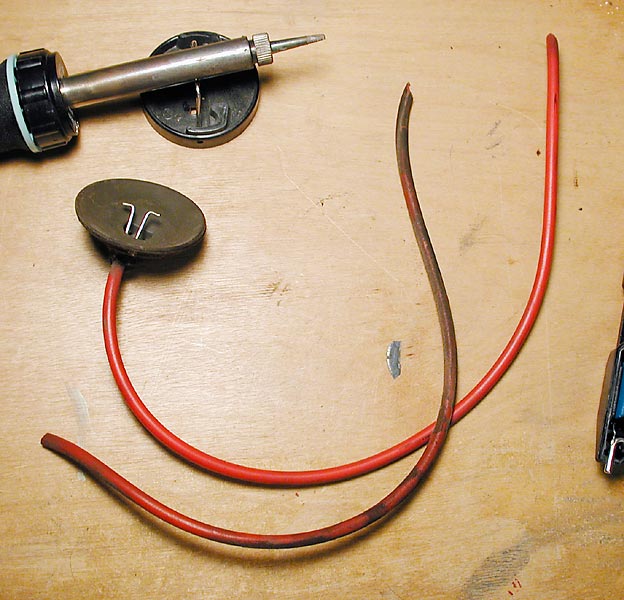
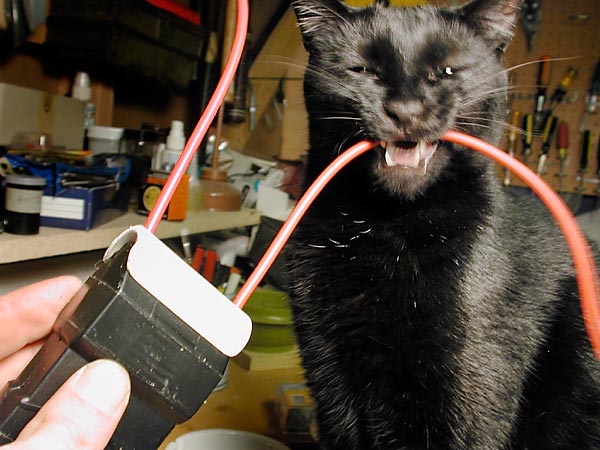
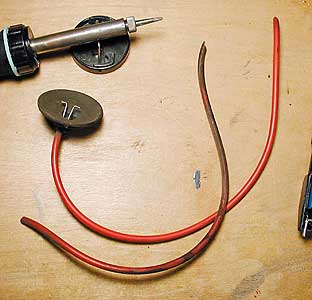
A suitable high voltage wire with heavy insulation is needed for the leads to the chamber electrodes. The wires here were salvaged from television flyback circuits. It is the wire suction cupped to the CRT tube. Use caution when removing it from the TV, even a dead TV, it's a high voltage wire for a reason. Use well insulated snippers and rubber shoes when cutting this wire.
|
|
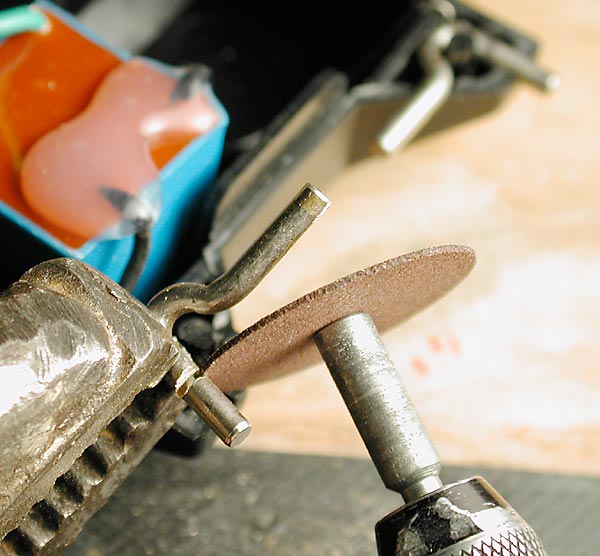
It is not necessary to cut the stun gun's electrodes down. Doing so only helps insulate the wiring slightly by keeping bare metal inside the plastic cover. It is important to preserve the inward facing electrodes to keep the stun gun from short circuiting.
|
| |
|
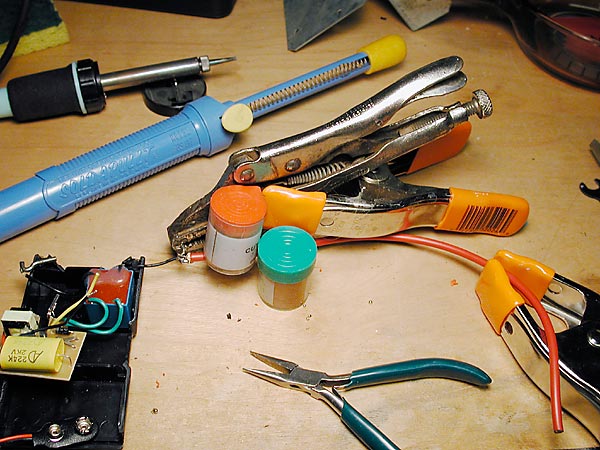
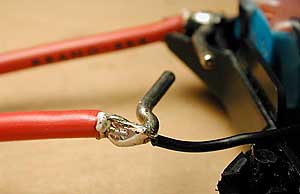
Solder your leads to each of the forward facing electrodes. This is a tricky solder job. For a proper union, all three surfaces must reach solder melting temperature. The electrode is thick and takes time to heat up. The black wire heats up fast and may require a heat sink (hemostat). Keep the joint streamlined so the electrode will fit back into position.
|
|
Hold the pieces to be soldered together with a soldering stand. Without one, this job is a pain but can be completed . Use your imagination. Remove any old solder and keep the tip of the iron clean with a sponge. A 30 watt iron held under the electrode is enough to get it going. Try not to cook the black wire.
|
| |
|
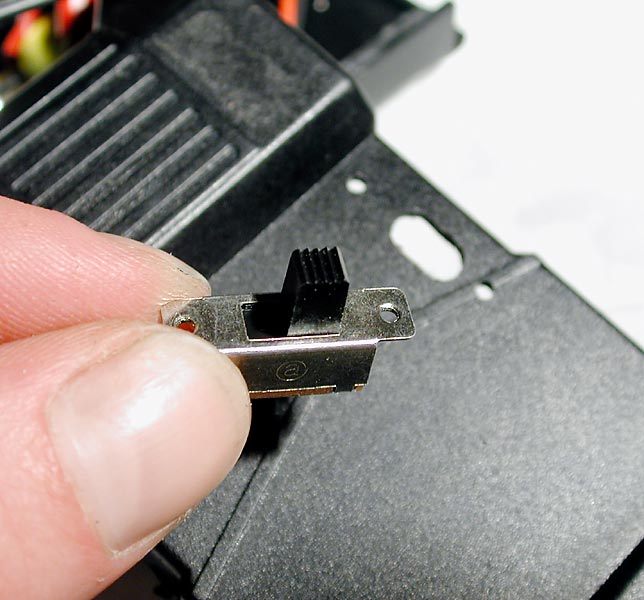
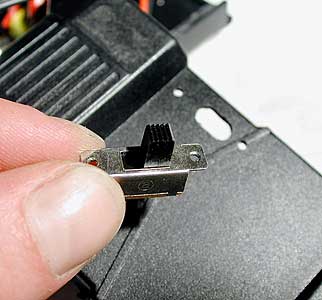
As long as the stun gun is still open. Mount an on/off switch as a safety and to conserve batteries. Also remove the original stun gun switch and replace it with wires and a quick disconnect. Wire this to your trigger, the quick connector allows for remote triggering options.
|
|
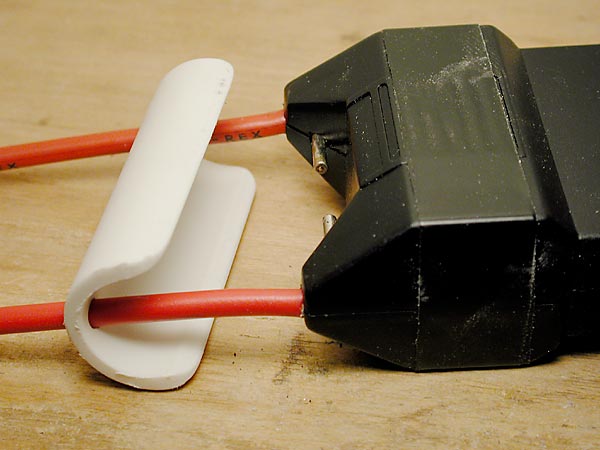
Reassemble the stun gun using supplied screws or cloth tape. A protective cap made from 3/4" PVC helps insulate the inward facing electrodes. Slide the leads through the cover and hold in place with silicone.
|

| |
|
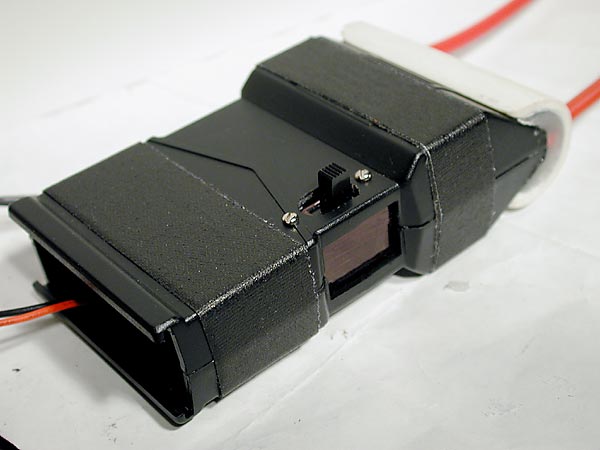
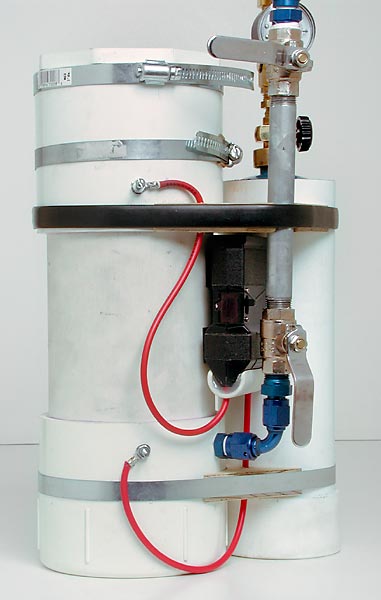
When finished, it should look similar to this. A small plastic cover was made to fill the hole left by the original switch, then hot glued in place. Mount the stun gun on the launcher allowing for battery changes. A removable fastener such as velcro can be used.
|
|
With the tips of the leads forming a small gap, a healthy spark will be produced. If the leads are moved out of gap, the spark will transfer to the inward facing electrodes of the stun gun. This fires harmlessly under the PVC cover. The flyback circuit wire provides plenty insulation at 65K volts.
|

| |
|
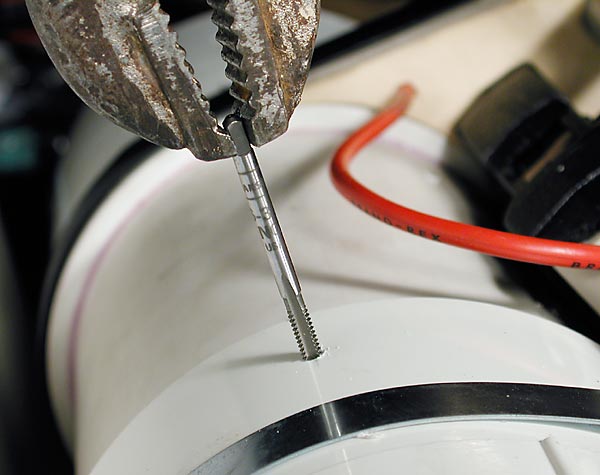
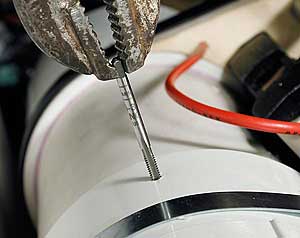
With everything in place, it's time to drill the holes for the electrodes. Drill into the coupling through two layers of PVC, position the electrodes where you won't get zapped. Measure twice, drill once. Use #6 machine screws for the electrodes, sharpen the tips to look like lightning rods. With the correct tap, thread the hole for the electrodes as pictured. Use grease when tapping PVC.
|
|
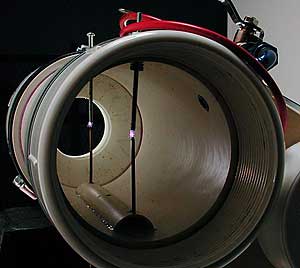
A single ignition requires electrodes placed on opposite sides of the chamber. The dual ignition pictured here has the electrodes on the same side of the chamber. Avoid running the leads too close to each other as inferior wire can leak voltage, reducing chamber spark. Use wire connectors to attach the leads to the electrodes. Insulate connectors if desired.
|

| |
|
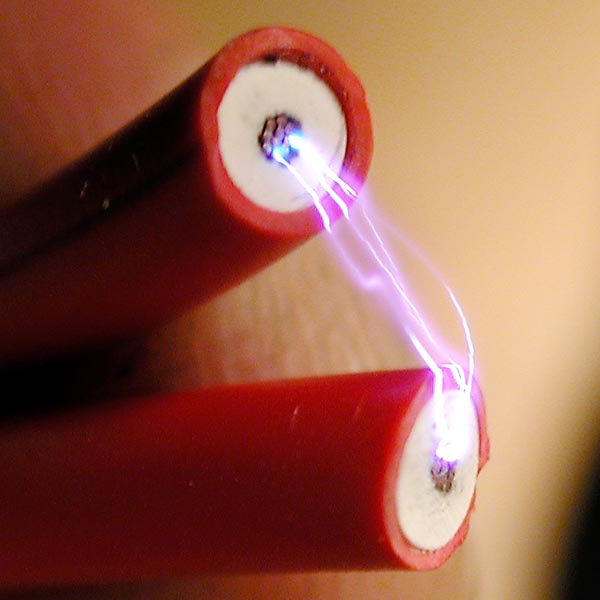
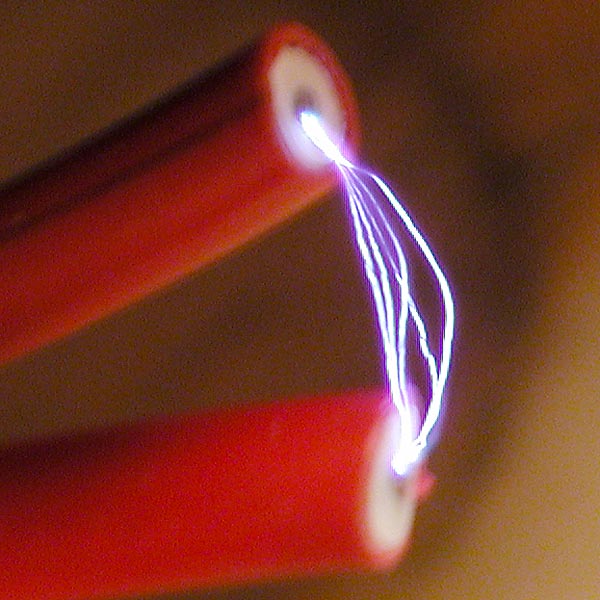
A dual ignition is created by running the circuit in sequence through two gaps. Touch your two hot leads to something metal and observe the two sparks, this should give you an idea how the dual ignition circuit works. Pictured here is a dual ignition produced with a chamber short. The spark gap is set by turning the electrode screws, a 1/4" gap is common. After the gap is set, lock the electrodes in place with locking nuts on both sides and cut off the electrode's screw head.
|
|
Quality counts. Take you time on this project. Think carefully about electrode placement. Hold the launcher in shooting position and place the electrodes away from contact areas. If using onboard propane, consideration must be given to the overall design before drilling any holes.
|
| |
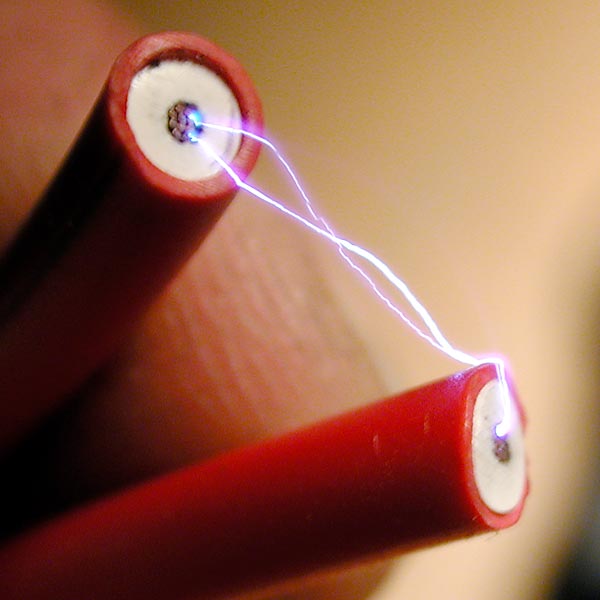
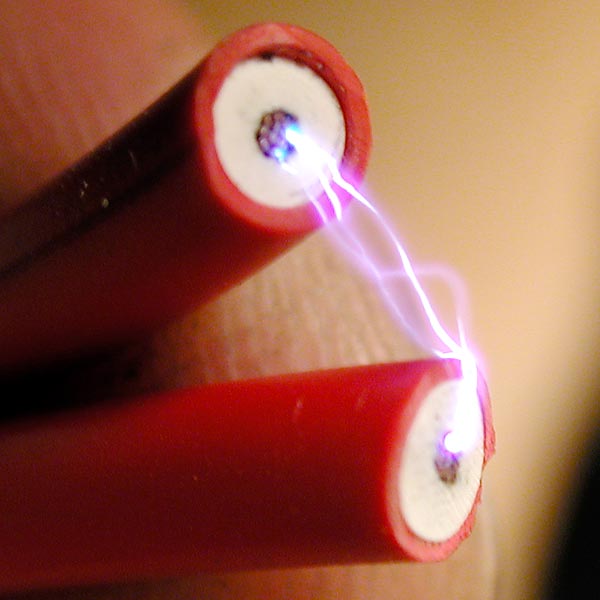
Q: How many sparks is it possible to produce at once between two points?
A: One
You might be able to produce more than one spark inside a nuclear fission reactor, or in a black hole or maybe in a dry part of Atlantis..but not inside your combustion launcher. These photos are camera tricks produced by slow shutter speeds, nothing more.
|
|
|