| |
pass-thru barrel
The pass-thru barrel is an obscure modification providing a few important benefits. The pass-thru looks like any other detachable barrel with male threads on one end. The difference is that the barrel extends through the threaded fitting providing a smooth passage for breech (rear) loading. When used with a female threaded slug cutter, breech loading potatoes is quick and simple using only a 6" pushrod. A knife edge added to the breech end of the barrel eliminates the need for a separate slug cutter. The pass-thru barrel requires a female thread in the chamber one size larger than the barrel used. A 1.5" barrel threads into a 2" or larger chamber. A 2" barrel would need a chamber opening of 2.5" or larger. Preparation and attachment of the threaded collar is critical as the pipe does not bottom out in the male threaded fitting as it normally would.
| |
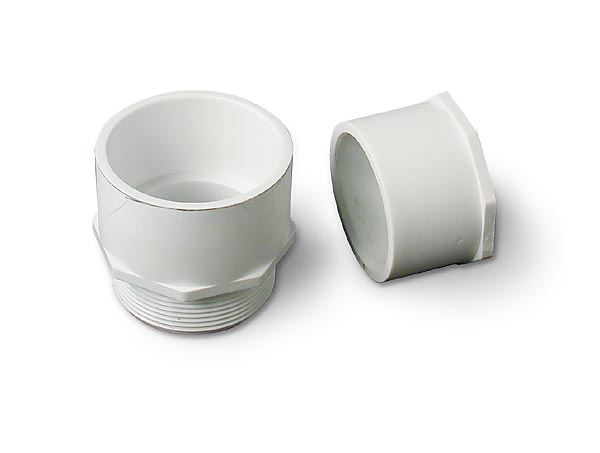
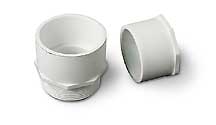
The following example will use a 1.5" barrel. Pictured above are the fittings needed, a 2"male threaded end and a 1.5" x 2" adapter. The 2" threaded fitting is ready to go but the adapter needs to be modified to allow the barrel to pass through it. This is sometimes referred to as a channeled fitting.
|
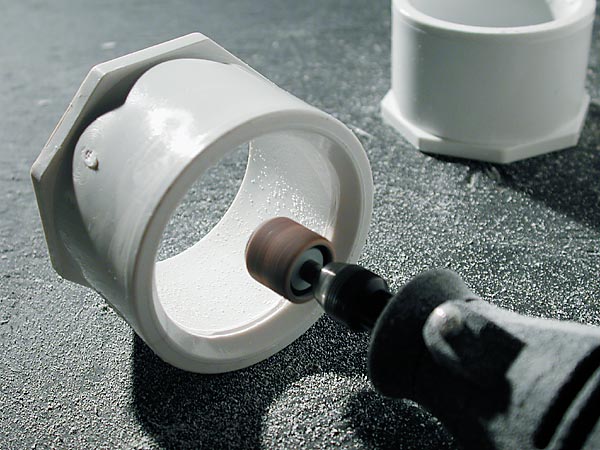
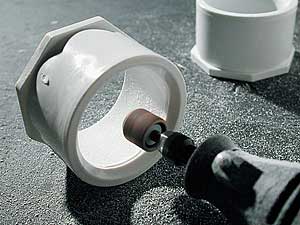
Sand the ridge inside the adapter down carefully. The inside of this fitting is tapered, almost a third of the fitting will need to be sanded to allow the barrel to pass through. When using a Dremel, keep moving in a circular motion to avoid flat spots. The ideal method is to use a table router with a fence set to the proper wall thickness. If the pipe does not pass through, it will leave a shiny mark inside the adapter, that's a high spot, grind it down.
|
Try not to sand the half of the fitting that the pipe already clears. This will be the only area left with a factory fitting tolerance. Take your time and make it strong, this is a high pressure coupling.
|
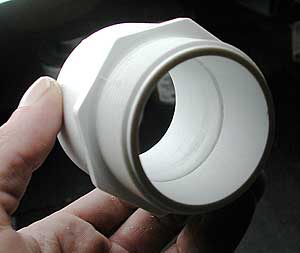
Cement the two halves of the collar together, see the solvent welding page for a step by step using these same fittings. Ensure the two haves seat properly to prevent a crooked barrel.
|
| |
|
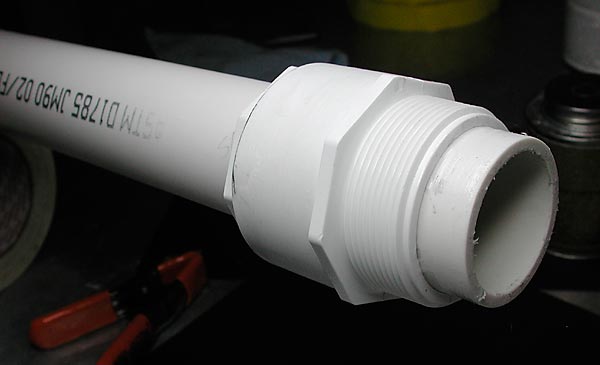
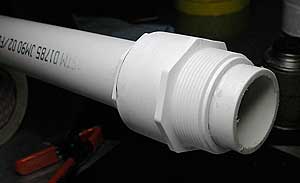
Slide the collar on the barrel and mark the area with a pencil. Position a half an inch or more of barrel behind the collar. Be sure to calculate this extra length into your chamber to barrel ratio, anything behind the spud is chamber. Use primer to soften the fitting and marked area on the barrel. Cement the marked area and slide the collar into place. Use plenty cement and mask threads if needed.
|
|
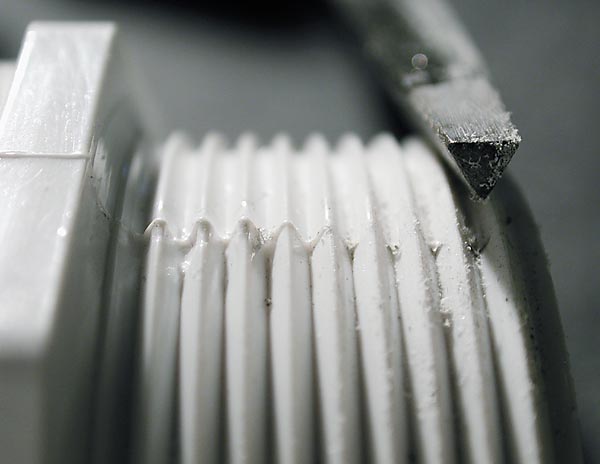
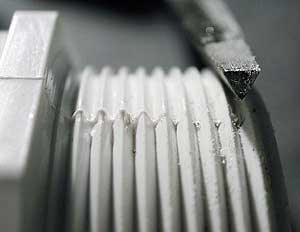
Clean up any seams in the threads using a triangle file and a razor blade. Apply a small amount of clear grease to the female threaded fitting to help prevent jams. By greasing the female fitting only, you keep the unused upper threads of the male fitting clean. Grease can be a mess, avoid getting dirt on greasy fittings.
|
| |

|
Pass-thru barrels offer the choice of safely adding some type of stopper or barrel bolt. A coarse wire mesh can be attached to prevent small objects from falling through. Use that #6 tap you bought to thread the electrode hole with to add a stainless steel barrel bolt as shown. Zinc bolts will bend, taking your threads with it.
|
The burn marks on the end of the barrel are caused when the launcher is test fired with no projectile or back pressure in the barrel. Use a wadding like paper towels or fabric when test firing. The construction techniques for the pass-thru barrel can also be used to create a seamless barrel extension.
|
|
|