Burnt Latke
  topframe
 
direct propane injection

Move over Right Guard. Pictured here is an onboard propane injection system. Liquid Propane is a powerful, convenient fuel which leaves no residue or offensive odor. It does produce carbon monoxide when burned so use in well ventilated areas only.

finished product

To operate, open lp cylinder valve completely. This will produce approx. 90 psi over the life of the cylinder. Warm temperatures will raise the cylinder pressure and colder temperatures will lower it. With the propane on and the supply hose charged, open the first valve to charge the meter pipe with 90 psi, close the first valve. Open then close the second valve to charge the chamber. The launcher is now ready to fire. During design, it is important to calculate the propane to air mixture inside the combustion chamber. The flammable limit of propane is between 2.4% and 9.2% per volume when mixed with air. The ideal mixture is about 4.03%.

To calculate the proper mixture and determine the size of your meter pipe, first measure the volume of your chamber using water. Multiply the chamber volume by .04 to determine the required volume of propane. A detailed explanation is available at the bottom of this page. 3/8" threaded steel pipe is available in a variety of lengths at about a dollar each. If a 6" pipe does not work adjust the pressure manually to determine if the mixture is too rich or lean then swap out with the appropriate new pipe. A pressure regulator (not pictured), allows complete control of the fuel mix. An oversized meter pipe can be filled with a low pressure source. This eliminates the problem of a bottle that is too cold to reach 90 psi or higher.

Most of the parts for direct propane are available at a hardware or plumbing supply. The blue fittings here can be found at a high performance auto shop. The parts list for steel or aluminum fittings is the same. Starting from the propane tank, in order: tank, Bernz-O-Matic torch head modified with 1/8" NPT threads, 1/8"x 1/4"NPT adapter, 1/4" regulator with pressure gauge, 1/4"x 3/8"adapter, 3/8" hose fitting with clamp (not Taiwan clamps), 3/8" solvent resistant hose, another 3/8" hose fitting and clamp, 3/8" ball valve, 3/8"x6" steel threaded pipe (meter pipe), 3/8" ball valve, 3/8"x 3/8" male connector and a 3/8"x 1/4" 90° street elbow.

aluminum and steel  
drilling the chamber

Use a 7/16" drill bit to create the hole for the street elbow. Position the metering device where it can be comfortably operated. Drill through the PVC coupling where there are two layers of plastic.

Use a 1/4" NPT thread tap to cut threads in the hole you just created. NPT threads are tapered to create a better seal. This item can be found at a plumbing supply or some hardware stores. Use clear grease to lubricate the bit while cutting. Check that your street elbow is truly 90° before tapping.

greased tap  
cutting threads

A wrench can be used to turn the tap. Cut a quarter turn forward then back up to clear the threads, another quarter turn forward then back up. Take your time and get it in there straight.

Wrap the fittings with gas line (yellow) or Teflon (white) thread sealant tape before assembly. Wind the tape in the correct direction, from camera position, the tape is wound clockwise. Use 3 to 6 wraps, the threads should almost disappear under the wraps of tape. Tighten the fitting using two wrenches on each connection. Over tightening is a common cause of leaks when using tapered plumbing fittings, tighten firmly.

teflon tape  
leaks galore

Pressure test the supply hose by spraying a soap like Simple Green on the fittings. If it bubbles, there are leaks. The fittings here are leaking at almost every connection. Only 2 to 3 wraps of Teflon tape were used on this attempt.

The fittings were re-taped with 4-5 wraps and assembled with a little extra torque. This sealed all leaks completely. The supply hose on this system can hold pressure for weeks, putting the launcher in a semi armed state. Check the meter pipe for leaks as well. On the subject of meter pipes, use the information below to determine the optimum volume and size for your meter.

dual ignition installed


Calculating the required volume of the meter pipe is easy but adding pressure to the equation makes it a little more involved. Temperature changes affect propane cylinder pressures greatly further complicating things. The trick is to find the sweet spot that works for the majority of conditions. This may require one meter be used during the summer and a larger meter during the winter or just use the larger meter year round and turn the pressure down during the summer. A variable meter design can provide stepless or incremental changes to the mixture.

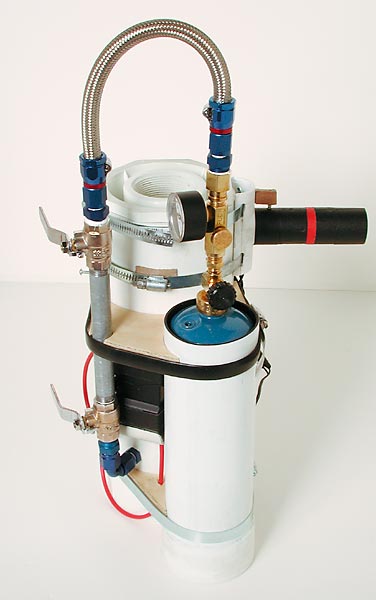
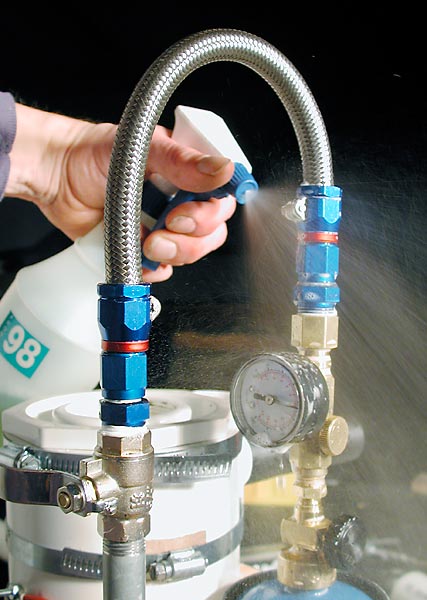
The launcher pictured above currently uses a 3/8"x6" meter pipe. It provides a powerful charge that ignites every time. However, it is possible to charge this system twice and still get ignition some of the time. Can this system handle a larger meter pipe? Lets find out.

Measuring the chamber with water we find its' volume is 2,600 ml (cc). The correct amount of propane is 4% by volume so multiply 2600 by .04 to get 104ml of propane by volume required inside the chamber to mix with the air. US pipe fittings are sold in imperial measurements so convert 2600ml to 158.7cubic inches (cu.in.) for the chamber measurement. Convert the meter pipe measurement from 104ml to 6.35 cu.in. Now the pressure can be calculated into the equation.

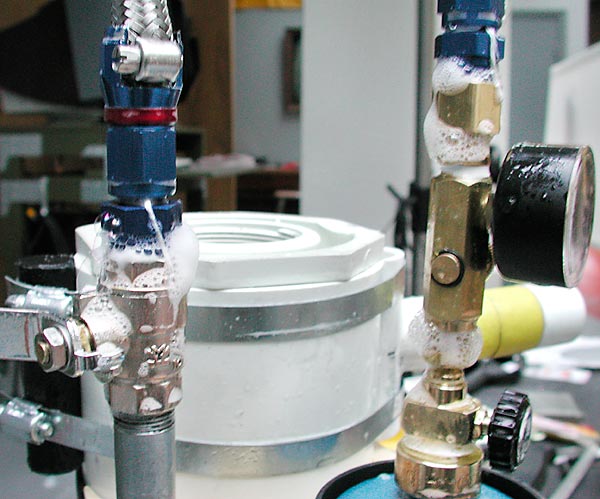
The pressure of a new propane cylinder is said to be between 110 to 130 psi at room temperature. The regulator and gauge pictured here shows a pressure reading of 80 to 90psi when fully open. For the following calculation we will assume 90 psi. The atmospheric pressure at sea level is 14.7 psia, this converted atmospheric measurement is available at your local weather database. This atmospheric measurement is the pressure inside the chamber before adding the propane.

The formula used to calculate the meter pipe volume with pressure factored in is,
P1*V1=P2*V2
or: initial pressure*initial volume=final pressure*final volume
or: cylinder pressure*meter volume=atmospheric pressure*required propane volume
or: (90psi)(meter volume?)=(14.7psia)(6.35 cu.in.)

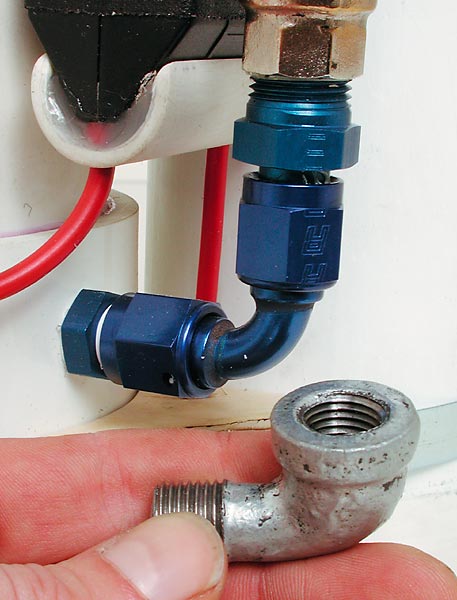
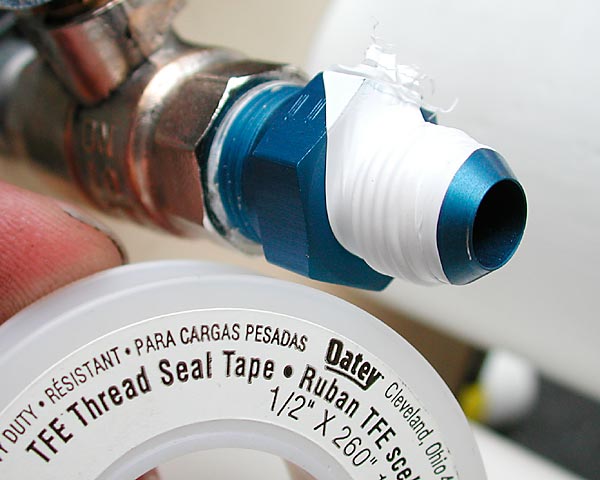
Multiply 14.7*6.35 to get 93.345 then divide this figure by 90 to get the required meter volume of 1.037 cubic inches. The launcher pictured uses a plumbing nipple as a meter pipe. Plumbing pipe and fittings have unusual and confusing naming conventions. For instance, the pictured pipe and fittings are labeled 3/8" but the inside diameter of the pipe is nearly 1/2" (0.46875"). Check the true ID of pipes and fittings before any calculations. To calculate the length of the meter use this formula,

(radius * radius) * pi * length = volume
or: (.234375 * .234375) * 3.14 * ? = 1.037

Re-arrange the formula to find the missing length,

volume / (radius * radius * pi) = length
or: 1.037 / (.234375 *.234375 * 3.14) = 6 inch meter at 3/8"(really 15/32") ID.

Remember that propane will only burn between 2.4% and 9.2% by volume with air. Too little or too much propane will not ignite. If this happens, carefully vent the chamber and go from there.

Just don't look in the chamber and pull the trigger to see what's going on.


An Excel spreadsheet for calculating propane meter volumes and sizes is available for download at the link below.
An online version, Fuel Tool Live, is also available.


download Fuel Tool 1.5e

Fuel Tool Live

back