| |
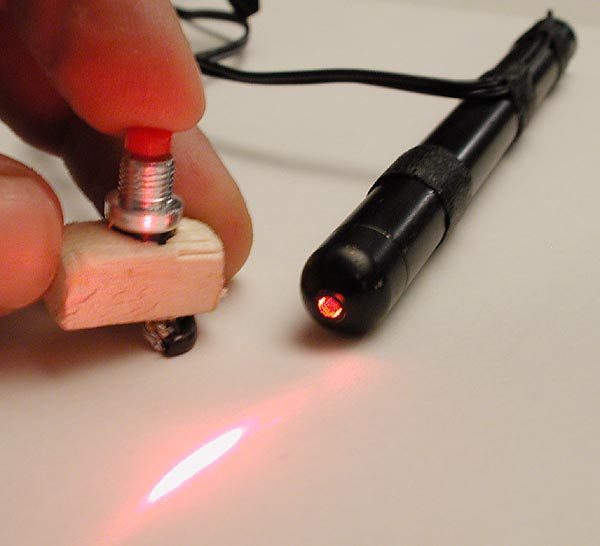
laser guidance
An inexpensive laser pointer can provide improved accuracy in close range or lower light situations. The laser is simply strapped to the barrel or modified to fit a traditional scope rail. Align the laser by looking through the empty barrel at a target then position the spot in the center. The common issue is how to switch the unit on and off.
|
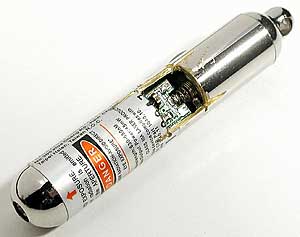
Once inside, it's clear that the miniature internal switch is too fragile for soldering. A connection between the pictured circuit board and battery spring would be unreliable. Before you cut a hole in your cat's favorite laser pointer, try this instead. Construct a simple, battery-side switch.
|
|
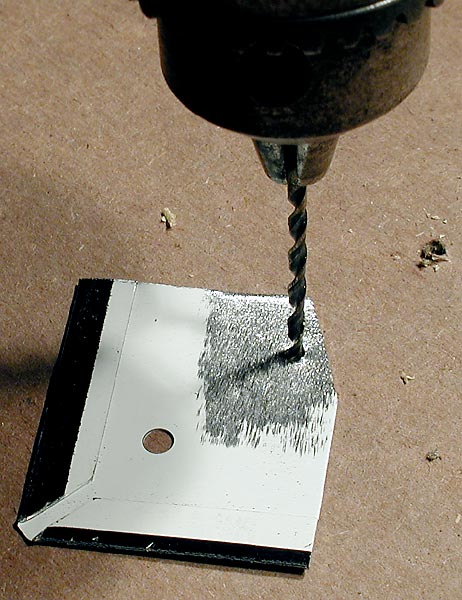
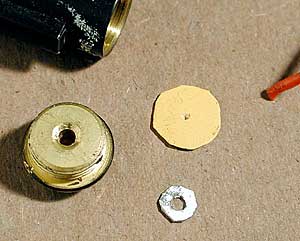
Drill a small hole in a thin sheet of metal, grind away any paint first. Use snips to cut a circle around the hole leaving a small, very flat doughnut. A small thin washer will also work.
|

| |
|
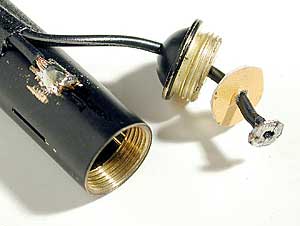
Remove the battery cap and drill a small hole in the center. Cut a disk from non-conductive material like cardboard and punch a small hole in the center. Use a thin wire (22-24ga.) to form the circuit.
|
|
Most laser pointers pass current through the cap and body to complete the circuit. The cardboard disk will insulate the cap from the battery. Solder the metal disk to one wire to pass battery current to the new switch. The return wire can be soldered anywhere metal on the outside of the pointer. Grind this area down before soldering.
|
| |

|
Place tape over the original switch to hold the laser in the on position. A momentary push button switch is connected to activate the laser. The switch is mounted in the front or rear handgrip. A two step switch can be built inside the Guano grip. Attach a lightweight spring switch (like tweezers) in succession with the heavier clothespin switch. The result: a light trigger pull activates the laser, a firm pull ignites the chamber. Quick disconnects on the wires help with disassembly.
|
|
|
|