| |
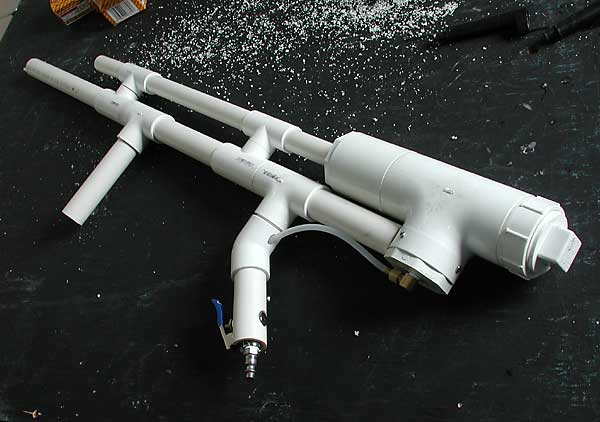
BB machine gun
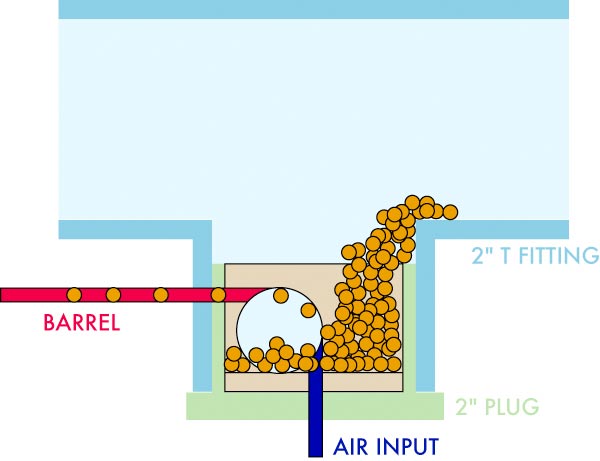
This item is unusual to be featured at Burnt Latke as it is pneumatic 'launcher'. The original was created by Piper's Precision and can be found at www.pipersprecisionproducts.com. A similar design was developed by the experienced builder; 'spudsonfire', and posted in the forums at www.spudtech.com. The spudsonfire design uses a 'vortex block' to guide the BB's into the barrel by means of the venturi effect. A continuous and plentiful supply of air at 40 PSI of higher is required and the rate of air consumption is quite high.
This BB gun is dangerous if used improperly.
Adult supervision is required during construction and operation.
Wear eye protection when shooting.

|
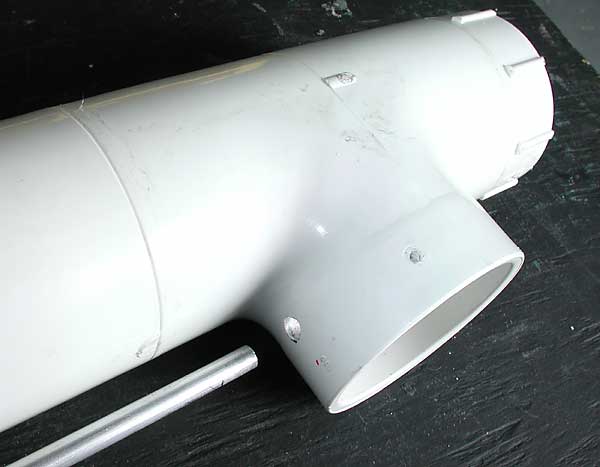
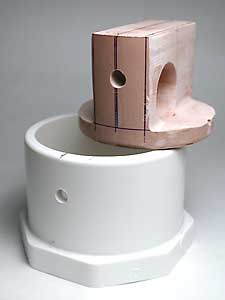
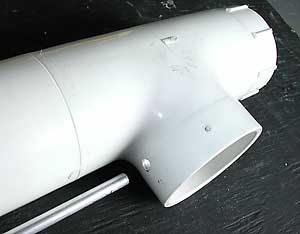
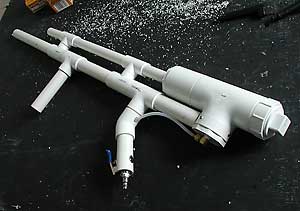
This launcher may be built in a variety of configurations. The barrel is inside the lower pipe, the top pipe is a support where accessories can be mounted. This version uses a 2" T fitting to hold the vortex and ammo and has a 1/2" and 3/4" PVC chassis similar to the Piper design.
|
|
A cutaway view of the T fitting shows the vortex block in place. The T fitting must be sealed on all three sides which will force the incoming air and BB's through the barrel.
|

|

|
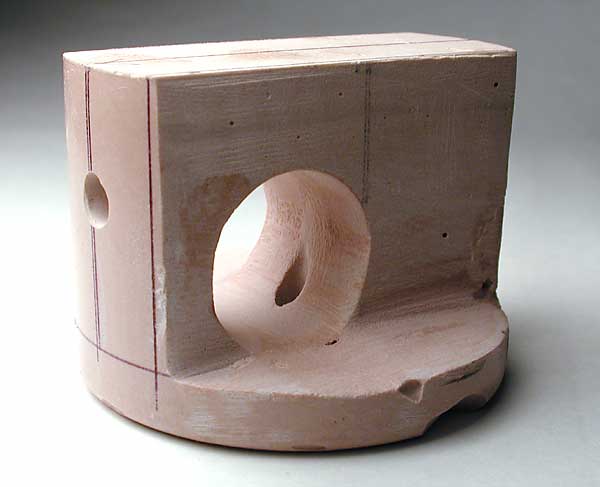
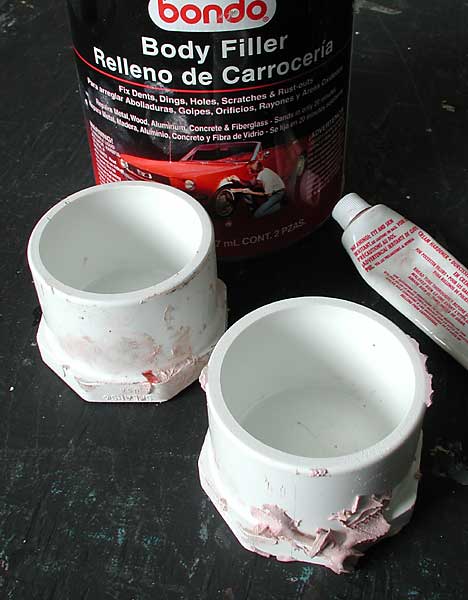
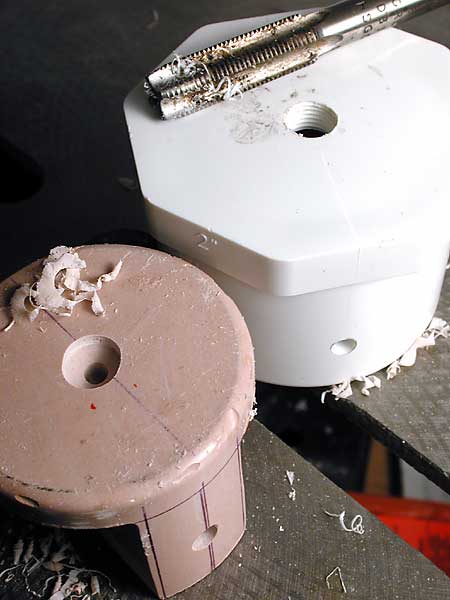
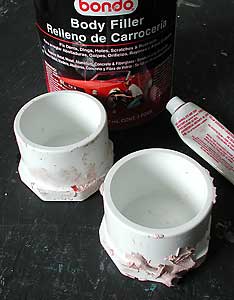
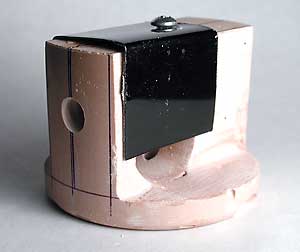
The vortex block is the most difficult part to construct and also the most important. The raw block can be made of any smooth, solid material. Solid PVC rod cut to shape is the ideal solution but could be hard to get. A block of hardwood might also work once turned to a suitable diameter. The block pictured here is made from bondo body filler which works well if made carefully.
|
|
The finished vortex block will sit flat on the bottom of a 2" plug which will be used as a mold to make the raw blocks. Mix the bondo with the hardener as per the instructions. Scoop the bondo into the plugs filling slightly above full. Slowly stir the bondo and tap the plug on a table to remove air bubbles. The blocks are dry and ready to cut in 45 minutes. It might be a good idea to make a couple in case one becomes damaged during manufacture.
|
|

|
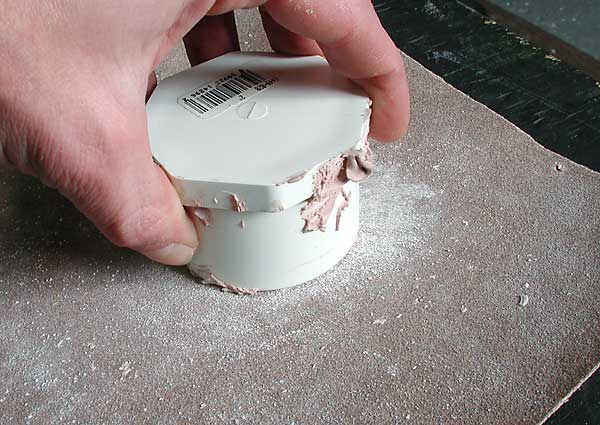
Use a belt sander or a piece of sandpaper on a flat surface to remove excess bondo. Try to sand the top surface perfectly flat. this will help with alignment later on. Bondo can be tough to sand by hand, overfilling the plugs too much will create extra work. After sanding, tap the cap on the table to dislodge the hardened block.
|
|
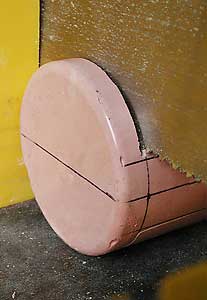
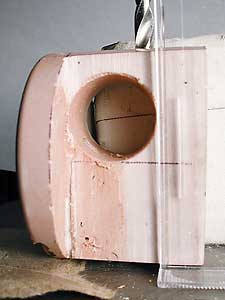
Draw guide lines (not pictured) on the block. Draw a center line along the top, sides and bottom of the block, mark one side as the front (barrel). Draw 2 more similar parallel lines to create a 3/4" wide area around the center line. Draw a new line around the circumference of the block, this will create the round base that will funnel the BB's into the vortex. The height of this base depends on the location where the barrel is intended to be mounted on the 2" T fitting. The vortex hole is 3/4" diameter and the barrel is at the top of this hole, the round base should be about 3/4" below the intended barrel hole.
|
|
|
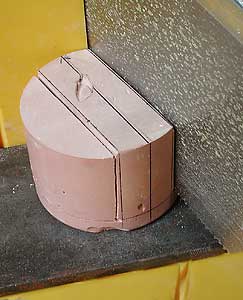
A variety of tools may be used to make these cuts, some with extreme precision. This example uses a hand saw and mitre box. The cuts for the round base should be done first as pictured above. Both of the base cuts need to be even so BB's can flow in from either side. The 2" plug used as a mold does not have parallel sides. A shim is required to make this cut straight.It's a good idea to not cut all the way through and to take your time. The second cuts pictured left are for the sides of the vortex block. The round base will hold the block steady as the bondo falls away. The cuts can be cleaned up with a file or sandpaper afterwards.
|
|
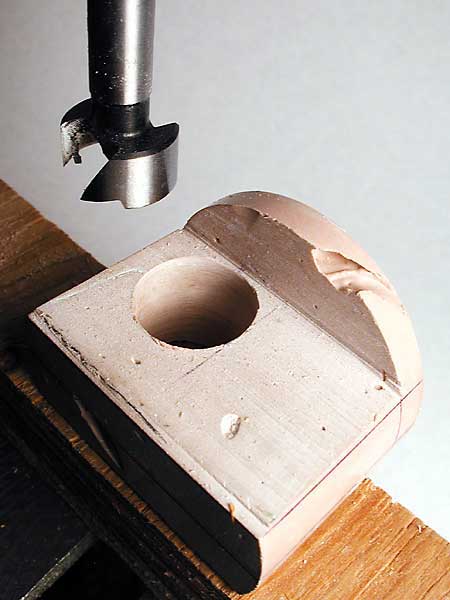
Draw a center line on one of the flat sides, this will help align the vortex hole with the center of the 2" plug. A drill press with a 3/4" forstner bit is used to create a smooth vortex hole in the block. Align the hole with the bottom of the block and the center line. The 3/4" vortex hole goes on the half closest to the muzzle. The hole here is a little high on one side. Bondo can be used to fix this or a new block can be cut from scratch.
|

|

|
The air supply hole is drilled in the center of the block from the bottom. The flat top surface keeps things square. A 5/32" or similar hole will be small enough to keep BB's from rolling back into the trigger or air source. Use the center lines as a guide.
|
|
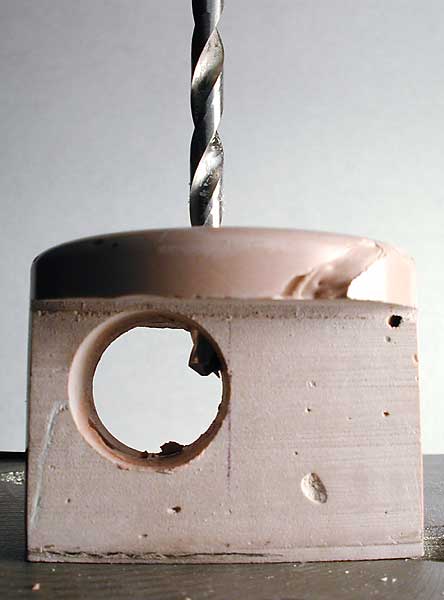
The BB exit hole can be drilled at 3/16" (.1875) or similar. This hole is tougher to align as the sides of the block are not parallel. Use shims, guidelines and maybe a square (CD cover) to get this hole exactly right. Both entry and exit holes should form a smooth tangent from the vortex hole with no bumps or dips.
|
|
|
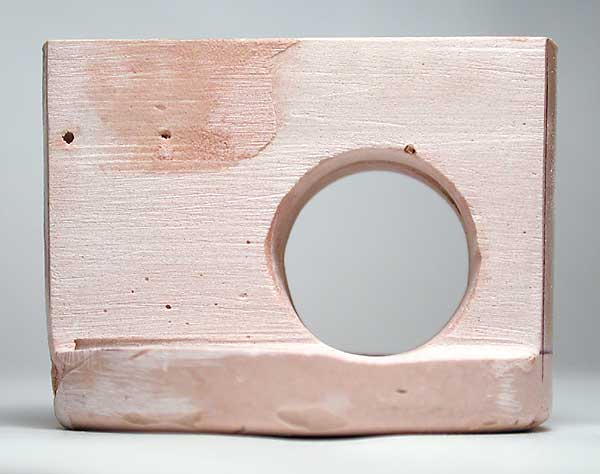
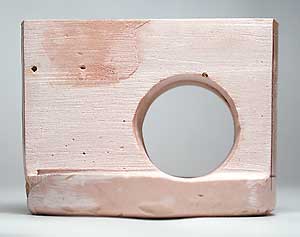
The finished vortex block should have a smooth passage on both sides to the center. Air bubbles along the inside of the 3/4" vortex were filled with bondo and sanded. A dremel with a 3/4" bristle brush was used to smooth out the path between the entry and exit holes.
|
|
Transfer the barrel hole position from the block to the PVC plug. Measure the height and put the 3/16" hole right on the seam to align.
|
|

|
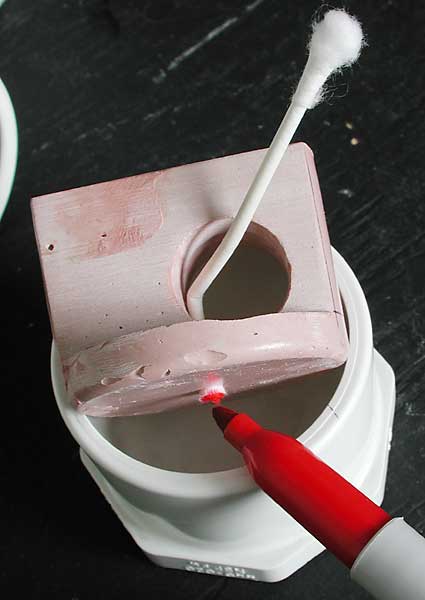
Transferring the air hole to the plug can be done with the aid of a cotton swab and an ink marker. Mark the rotation of the block in the plug before proceeding. Place the swab through the air hole and soak with ink. Carefully put the block in the plug then remove. Drill a 5/32' hole where the ink mark is.
|
|
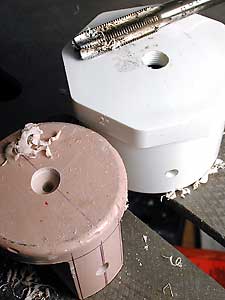
After checking that all holes are aligned, drill a 21/64" hole in the center of the 2" plug. Thread this hole with a 1/8" NPT thread. This hole may also be carefully drilled into the bondo block airhole at a very shallow depth to help funnel air into the vortex.
Use care when threading 1/8" NPT nipples or adapters through this hole as they may penetrate and crack the bondo vortex block.
|
|
|
The final addition is the 'skirt' that helps keep the BB's from flooding the vortex hole and jamming the gun. The metal skirt pictured here is U shaped and covers both sides of the vortex hole. It is held in place with a small, short screw. Height adjustments to the skirt may be required to get things shooting smoothly. Start with one longer than pictured here then trim to the appropriate height with snips.
|
|
Measure the position of the barrel hole on the 2" plug and transfer it to the 2" T fitting. Use the seams on the fitting (hopefully) as a guide. It should wind up close to where you planned. 3 or more short machine screws hold the 2" fitting in place, these can be drilled first then transferred to the 2" plug. 4 wraps of teflon tape help seal this union. A screw is in position opposite the barrel on the back, this important screw holds the vortex block in place.
|
|
|
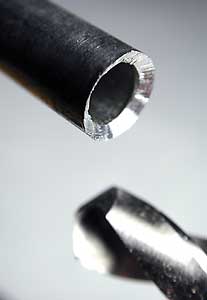
This barrel is made from 1/4" OD x 36" aluminum tubing. The inside diameter is just slightly larger than a .177cal BB. It is so close that imperfections on the inside edge of the barrel can cause ammo jams. A bevel is put on the rim of both sides of the barrel to protect the inside edge. A drill bit is used to cut the bevel and a Dremel to polish it. The barrel holes on the T fitting and 2" plug are enlarged to 1/4". The barrel wrapped with teflon tape should stay in this hole by friction alone. A very shallow 1/4" hole may be added to the edge of the barrel hole on the block to help with the barrel>block interface. If the BB's become dented of deformed, they may get stuck inside a barrel that fits too tightly. A barrel with a slightly larger ID may prevent jams when using recycled ammo.
|
|
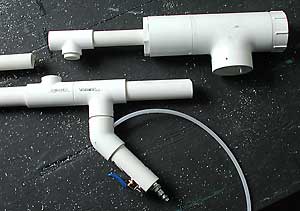
It may be a good idea to leave some chassis parts unglued until the design is tested. The PVC barrel cover does not attach to the T fitting, it just rests against it. The upper tubing provides strength. The front of the T is sealed by a 3/4" cap on the 3/4" pipe which extends slightly into the chamber through a 2">3/4" reducer with the stop ring removed. BB's are loaded into the sealed T fitting through a screw off cleanout cap on the end.
|
|
|
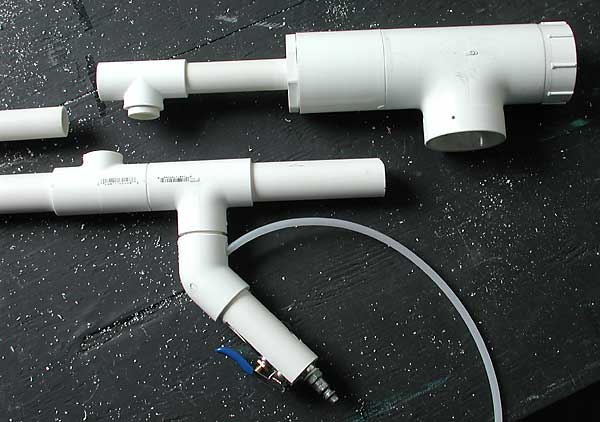
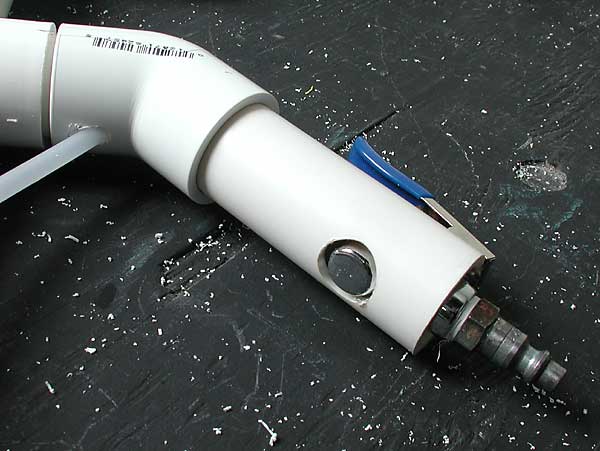
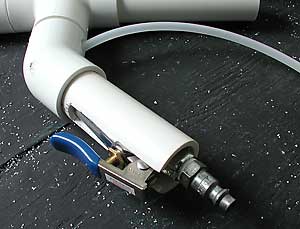
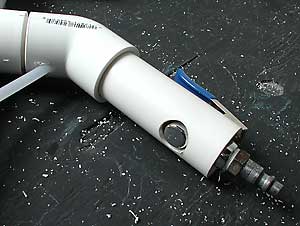
A standard blowgun with quick release is used as the trigger. It is threaded to a 1/4" brass compression fitting which attaches to a length of 1/4" polyethylene or better tubing. The other end attaches to a 1/4"x1x8"NPT brass fitting which threads into the 2" plug. There is no 'safety' on this trigger and it is easy to bump accidentally. When connected to an air source, the BB gun is armed and should be pointed in a safe direction.
|
|
This handle is made from 1" PVC pipe. The storage hook may need to be cut away from the blowgun for it to fit inside. An area of the pipe is cut away the width of the nozzle as pictured above. A 3/4" hole in the back of the handle helps the trigger lie flat inside.
|
|
|
The finished BB gun can now be connected to an air source and tested. 40 PSI should be enough to get it shooting at a fast rate of fire, the pressure can then be increased to suit conditions. If the gun jams and stops firing, shake to redistribute the ammo in the chamber. Constant jams might require an adjustment to the skirt or block. Paper and other debris may get caught between the ammo and barrel wall causing a stubborn jam. In this case, disconnect the air and remove the barrel or block to clean.
|
|
|
|